
Starlink provides satellite internet through a user-installed system. The process involves selecting a suitable location for the dish, connecting the components, and using the mobile app to finalize setup. Unlike traditional satellite services that often require professional technicians, Starlink hardware is designed for self-installation.
The kit includes the dish, router, power supply, and cables needed to establish a connection. Additional mounts may be required for permanent placements. The system relies on a clear line of sight to satellites overhead, making site selection a critical initial step.
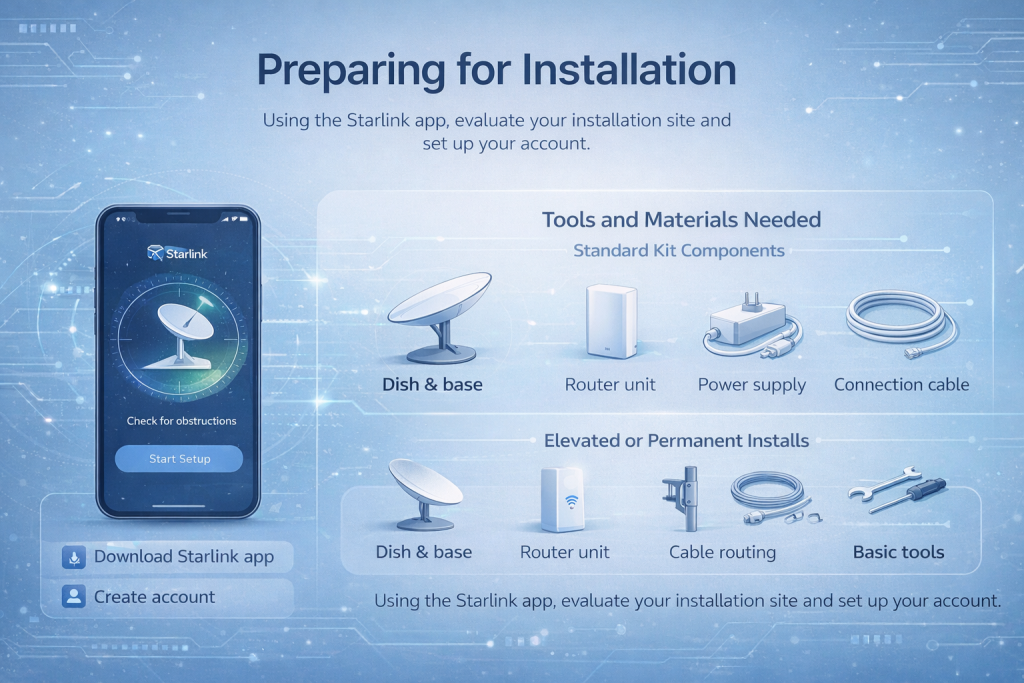
Preparing for Installation
Before unboxing the equipment, download the Starlink app on a smartphone. The app serves as the primary tool for site evaluation, setup guidance, and ongoing management.
Create an account in the app if not already done. This allows access to tools that assess potential installation sites. Preparation also involves identifying possible mounting options, such as ground level with the included base or elevated positions.
Tools and Materials Needed
The standard kit provides essential components for basic setup.
- Dish with integrated base or kickstand
- Router unit
- Power supply and cables
- Connection cable between dish and router
For elevated or permanent installations:
- Compatible mounts for roofs, walls, or poles
- Cable routing accessories if needed
- Basic tools for securing mounts
Temporary setups can use the provided base without additional hardware.
Selecting the Optimal Location
The dish requires an unobstructed view of the sky to maintain consistent satellite connections. Objects like trees, buildings, or poles can interrupt signals.
Use the app’s obstruction checker tool. This feature employs the phone’s camera to scan the surrounding sky from the proposed location.
How the Obstruction Tool Works
Stand at the intended dish position with the phone held at approximate dish height. Follow app prompts to move the camera across the sky area.
The tool generates a visual map indicating potential blockages. Areas with minimal interference provide better performance. Test multiple spots if the initial scan shows issues.
For ground-level placements, ensure the area allows a wide field of view. Elevated positions often resolve ground-based obstructions.
Enhancing Starlink Site Surveys with FlyPix.ai
At FlyPix.ai, we specialize in leveraging advanced AI to analyze satellite, drone, and aerial imagery for infrastructure projects – and Starlink installations benefit directly from this approach. When planning a dish placement, especially in rural or forested areas where obstructions are hard to assess from the ground, we process your geospatial images to quickly detect and outline trees, buildings, poles, rooftops, and other potential blockers across the entire field of view.
This gives you a detailed obstruction map before any physical visit, helping confirm whether a location will deliver reliable connectivity or if an elevated mount is necessary. We make the process straightforward: upload the imagery, and our platform handles the precise object detection in seconds, saving significant time compared to manual reviews or repeated on-site checks.
Join 10,000+ users already streamlining their geospatial workflows with FlyPix.ai.
Ready to optimize your Starlink site selection with next-level precision? Start your free trial today!
Mounting the Dish
Temporary installations use the kickstand or base for quick deployment. Position the dish upright and stable. Permanent setups involve securing a mount.
Common Mounting Options
- Roof installations for maximum clearance
- Wall or eave attachments
- Pole mounts on existing structures
Follow mount-specific instructions to attach securely. Route cables carefully to avoid damage. Ensure the dish faces the general sky direction without manual tilting for certain models.
Some dishes adjust orientation automatically during initial connection.
Connecting the Hardware
After positioning the dish, connect the provided cable from the dish to the router. Insert firmly with proper orientation.
Plug the power supply into the router and an outlet. The system powers on and begins searching for satellites.
Cable Management Tips
- Use weather-resistant cables for outdoor runs
- Avoid sharp bends or pinches
- Secure cables along paths to prevent tripping or damage
The router should be placed indoors in a central location for WiFi distribution.
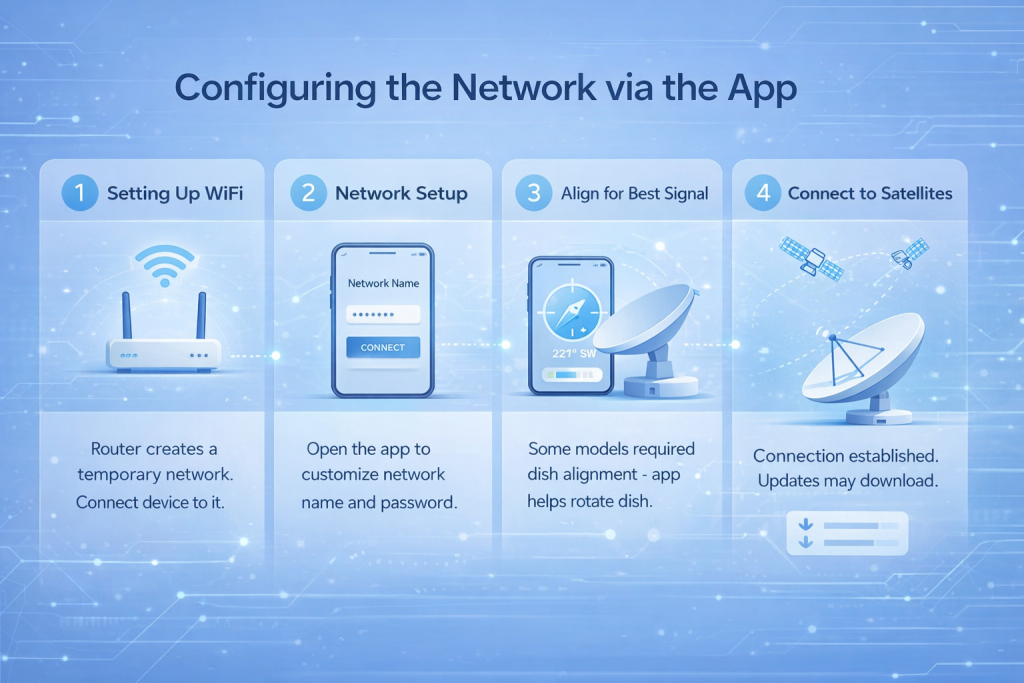
Configuring the Network via the App
Once powered, connect a device to the temporary network broadcast by the router.
Open the app to guide through network setup.
Setting Up WiFi
The app prompts to create a custom network name and password. This secures the connection.
Some models require alignment adjustments. The app displays a compass or indicator to rotate the dish if necessary.
Connection to satellites occurs within minutes. Software updates may download automatically.
Testing and Optimization
After initial connection, monitor the app for status indicators. Check for alerts related to obstructions or alignment. The app provides a detailed view of detected blockages over time.
Performance Checks
- Verify signal strength
- Test connection stability
- Observe for interruptions during use
Minor adjustments to position can improve results if issues arise.
Troubleshooting Common Issues
Basic problems often resolve with simple steps.
- Power cycle the router and dish
- Recheck cable connections
- Confirm no new obstructions
- Use app diagnostics
Persistent issues may require repositioning or support contact through the app.
Conclusion
Installing Starlink involves straightforward steps focused on location selection, hardware connection, and app-based configuration. Proper site choice ensures reliable operation. The self-orienting features and app tools simplify the process for most users. Once set up, the system provides satellite internet access with minimal ongoing adjustments.
Frequently Asked Questions
Test alternative spots, including elevated positions. Minor blockages may allow acceptable performance, but significant ones cause interruptions.
Certain models self-adjust during setup. Others use app guidance for initial orientation.
Yes, the base allows easy placement and relocation without permanent mounts.
Satellites are acquired in minutes after powering on, with possible updates extending the process.
No, the system supports self-installation, though assistance is available for complex sites.
Built-in heating melts typical buildup, though heavy accumulation may temporarily affect performance.
Updates occur automatically when connected, often overnight.
Central locations improve WiFi coverage, with cable length limiting distance from the dish.