

OpenClaw isn’t a typical chatbot. It’s a local-first AI agent that connects through platforms like Telegram and executes commands directly on the user’s system. That kind of power is useful – but also carries risk if left unchecked. This guide covers how to get OpenClaw installed, connect it to an AI model, integrate a messaging platform, and apply the right security steps to keep everything under control. The setup takes around 15 minutes, and a few careful decisions early on can prevent bigger problems down the line.
Why OpenClaw Is Worth Setting Up Right
OpenClaw sits somewhere between a personal assistant and a command-line automation layer. It doesn’t live in the cloud. It doesn’t route your prompts through third-party services unless you explicitly let it. Everything runs on your own machine – which means setup isn’t just about convenience, it’s about control.
For developers, researchers, and anyone who spends time jumping between systems and tools, OpenClaw offers a lightweight way to handle tasks through natural language. You can chat with it over Telegram, ask it to generate summaries, write files, pull live search data, or automate workflows that normally take five tabs and a few shell scripts.
But this flexibility comes with real access. The same bot that writes Markdown can also delete files if misconfigured. So while installation only takes a few minutes, it’s worth doing deliberately. Below is a structured setup that gets OpenClaw running quickly, paired with the safety checks that let you actually trust it. Nothing here is complicated – but skipping steps can cost you. Let’s keep it clean from the start.
FlyPix AI: Applying Local AI Agents in Real Workflows
Tools like OpenClaw reflect a growing trend in how AI gets deployed – small, purpose-built agents that run close to the user, not hidden behind layers of cloud infrastructure. At FlyPix AI, we see a similar pattern in geospatial work. Our AI agents analyze drone, aerial, and satellite imagery on demand, helping teams detect patterns, monitor changes, and act faster.
Whether it’s a local script running on a developer’s laptop or a high-performance model trained for infrastructure inspections, the principles are the same: keep things lightweight, modular, and under control. OpenClaw gives users that freedom on their own systems. We apply the same thinking when building pipelines for industries like agriculture, energy, or smart cities – minimizing complexity, maximizing visibility.
You can also find FlyPix AI on LinkedIn, where we maintain our company presence. At the core, our focus remains the same – building AI systems that are structured, explainable, and grounded in real operational needs rather than abstract experimentation.

Complete Setup Guide: Installing and Connecting OpenClaw
This section covers everything from the first terminal command to your first working conversation with OpenClaw. It’s broken down into clear steps so you can follow along without second guessing.
1. System Requirements and Prerequisites
Before you start, make sure you have the following ready:
- A computer running macOS, Linux, or Windows (WSL also works)
- Node.js installed
- A Telegram account (or WhatsApp, Discord, iMessage if preferred)
- Basic command line experience
- Optional: Brave Search API key if you plan to enable web search
2. Installing OpenClaw
There are two ways to install OpenClaw, and both are fast. If you’re just getting started, the shell script is the simplest option – it handles everything automatically.
Option 1 (recommended – shell script):
Run this in your terminal:
| curl -fsSL https://openclaw.ai/install.sh | bash |
Option 2 (npm install):
If you already work with Node.js and prefer using npm:
| npm install -g openclaw |
Once installed, the openclaw command becomes available system-wide. You can now run the setup wizard and start configuring the agent.
3. Launch the Onboarding Wizard
Once OpenClaw is installed, the next step is to initialize it using the onboarding wizard. This is where you configure the basics: model selection, chat integration, and access permissions. Start the wizard with:
| openclaw onboard –install-daemon |
The wizard will guide you through several initial setup steps:
- Confirming a security warning (since the bot runs with access to your local system)
- Choosing Quick Start to apply safe default settings
- Selecting your preferred AI provider (OpenAI, Claude, Gemini)
- Logging in or pasting an API key to connect the model
This step ensures that OpenClaw knows which model to use and how to interact with it securely.
4. Connect Your Chat Platform (Using Telegram as Example)
After selecting your model, you’ll be prompted to link OpenClaw with a messaging platform. Telegram is the most common option, but Discord, WhatsApp, and others are also supported. To connect Telegram:
- Select Telegram when prompted by the wizard
- Open the Telegram app and message @BotFather
- Send the command /newbot and follow the prompts to name your bot
- Copy the token @BotFather gives you, then paste it into the OpenClaw terminal
Next, restrict who can access your bot by adding your Telegram user ID:
- Search for @userinfobot in Telegram and press Start
- It will return your numeric user ID – copy that number
- Paste it into the terminal when OpenClaw requests it
This binds your bot to your account only, so no one else can issue commands without explicit pairing.
5. Choose the Interface: TUI or Control UI
Once Telegram is connected, you’ll choose between:
- TUI – text-only terminal UI; fast, simple, and good for debugging
- Control UI – browser-based interface; easier to navigate visually
For your first run, TUI is a good option. You’ll set your bot’s name and how it should refer to you, then have a short chat to confirm everything is working.
6. Skills (Optional Plugins)
During onboarding, OpenClaw will ask if you want to install skills. These are extra capabilities such as:
- Sending emails
- Editing or generating files
- Web searches
- Calling APIs
If you choose to install them, you can add them via the built-in tools, configuration, or by installing plugins (often with npm or pnpm). You can also skip this step and add them later.
7. Enabling Web Search (Optional)
By default, OpenClaw responds using only its installed model. But you can expand its reach by letting it perform real-time web searches. This requires a Brave Search API key, and the process to set it up is quick. To enable web search:
- Ask your bot directly in chat: “How can you do web searches?”
- It will respond with instructions and a link to get a Brave Search API key
- Follow the link, generate your key, and copy it
- Send the API key back to the bot in the same chat window
Once the key is stored, your bot will be able to search the web and include up-to-date information in its responses.
8. Test and Confirm Everything Works
Once setup is complete, it’s time to make sure OpenClaw is fully functional. Open Telegram and:
- Navigate to your new bot
- Send the command /start
- Ask a simple question like: “What’s the weather today?” or “Summarize the news.”
- Wait for the reply – it should respond through the chat
If the bot replies, you’re good to go. You now have a working local AI agent, connected to a model, secured to your identity, and ready to take on real tasks.
How to Secure OpenClaw After Setup
Once OpenClaw is installed and connected, it’s tempting to dive right in. But before you start automating tasks or sending file commands, there are a few key protections worth setting up. This step takes just a few minutes and drastically reduces the chances of accidental exposure or misuse.
Limit Local Access and Require a Token
By default, OpenClaw may be reachable from outside your machine. That’s not what you want. To keep it local:
- Open the openclaw.json config file (usually located in your ~/.openclaw/ folder)
- Find the setting that says bind: “0.0.0.0” (it may be nested under “gateway”)
- Change it to bind: “127.0.0.1” or bind: “loopback” so it only responds locally
Next, add a basic access barrier:
- In the same config, enable “authentication”: { “mode”: “token” }
- Set a secure token – think of it like a private API key
This ensures only authorized local apps or scripts can talk to your bot.
Restrict Who Can Talk to the Bot
If you’re using Telegram or another chat platform, make sure the bot isn’t listening to just anyone.
Inside the same config file, locate the channels section and update your messaging platform (e.g. Telegram):
| Set “channels”: { “telegram”: { “dmPolicy”: “pairing”, “groupPolicy”: “disabled” } } |
This prevents your bot from responding to unapproved users or getting dropped into public groups.
Secure Credentials and Run a Quick Audit
OpenClaw stores sensitive API keys and model tokens in a local file. To protect it:
- Make sure only your user can access ~/.openclaw/credentials
- Use the command chmod 700 on that file if needed
Then, use OpenClaw’s built-in tools to scan and fix any loose ends:
- Run a security audit: openclaw security audit –fix –deep
- Run a health check: openclaw doctor
- Restart the OpenClaw process to apply changes (for example: openclaw gateway restart, or restart your process manager like pm2/systemd)
Taking the time to apply these three steps means you can start using OpenClaw without worrying about who else might be listening. It’s not overkill – it’s just good setup hygiene.
Smart Habits for Running OpenClaw Safely Over Time
Setting up OpenClaw is one thing. Keeping it reliable is another. Because this agent runs on your own system and responds to natural language, even small missteps can snowball if you’re not paying attention. You don’t need to be paranoid – just consistent. Here are some habits that help you stay in control without overcomplicating things:
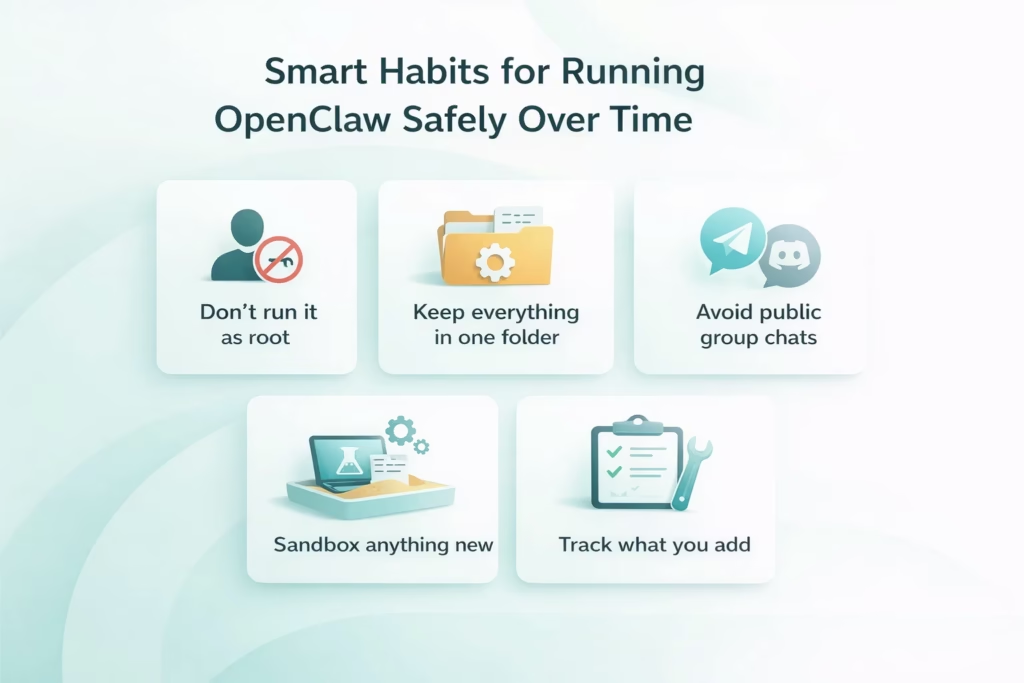
- Don’t run it as root: There’s rarely a reason to launch OpenClaw with full system privileges. If something goes wrong, you’ll want it confined to user-level access.
- Keep everything related in one folder: Logs, skills, config files, experiments – put them in a dedicated directory. It makes cleanup easier and helps you avoid stepping on other parts of your system.
- Avoid public group chats: Even if it seems harmless, adding your bot to Telegram or Discord groups opens up weird edge cases. One badly phrased message and it might try to do something you didn’t plan for.
- Sandbox anything new: Testing a new skill? Connecting to a different model? Do it in a throwaway workspace or VM first. You’ll catch issues before they hit your real setup.
- Track what you add: OpenClaw is modular. Over time, you’ll install plugins, change model configs, maybe hook in web search or custom scripts. Just keep a running note of what’s changed and why – it makes debugging easier if something breaks a month from now.
You don’t need a full SOP or internal wiki. Just a little structure and caution go a long way when the tool you’re using can write files, fetch web results, and respond 24/7. OpenClaw is powerful by design. These habits help you keep it predictable in practice.
Expanding Capabilities with Control
Once you’ve got OpenClaw working reliably, it’s natural to want more out of it. The platform is built for that. You can add new skills, switch between AI models, or connect external systems through hooks. But as with any tool that runs locally and can execute commands, expansion isn’t just about unlocking features. It’s about doing it on your terms.
Some of the most useful extensions include skill modules for writing files, querying APIs, or integrating with project-specific workflows. These are installed through a single command, but each one changes how the bot behaves and what it can touch. You can also link multiple LLMs and route requests based on intent or task type, especially useful when balancing speed versus reasoning depth.
If you’re planning to move beyond your laptop and run OpenClaw on a VPS, make sure the security foundation is solid before exposing anything externally. A well-configured instance can handle recurring jobs, batch processing, or lightweight automation across systems. Just don’t flip every switch at once. Each new feature should be intentional, tested, and scoped. It’s the difference between a useful assistant and a runaway process you didn’t mean to start.
Conclusion
OpenClaw isn’t complex for the sake of it. It’s designed to do exactly what most people need from a local AI agent – run securely, respond quickly, and stay within reach. Once installed and connected, it becomes a quiet but capable part of the workflow. Most of the setup is straightforward, and the few security steps that take extra attention are absolutely worth it. Especially when the tool sitting on your machine can write files, connect APIs, or browse the web.
What makes OpenClaw interesting isn’t just what it does out of the box, but how cleanly it scales. Add a skill. Try a different model. Hook it into something bigger. But only when it makes sense. That kind of control – local, modular, and deliberate – is exactly what makes agents like this useful.
FAQ
Not always. If the chosen AI model runs locally or doesn’t require cloud authentication, OpenClaw can operate offline. That said, some skills like web search or model APIs do rely on internet access.
Yes, OpenClaw supports switching between models or even routing tasks to different providers. It depends on the setup, but it’s possible to configure model-specific behavior if needed.
It can be, as long as it’s configured properly. Running it with limited user permissions, setting up authentication, and avoiding public exposure are all key to keeping it secure.
The onboarding process is designed to be reversible. Most issues can be fixed by restarting the gateway, editing the config manually, or running the built-in audit tools. Nothing gets deeply embedded into the system.